Showing posts with label how to. Show all posts

15 December 2010

oh, you fancy, huh? (an easy how-to for custom pillows)

my most recent "creations"

pillows are a great way to punch up a space with color, pattern, texture (and shine - OOH, SHINY!). they are also super easy, even if you don't know how to sew.

grab someone who has a machine and ask them (nicely - don't be so bossy, fancy!) to set it up and show you how to sew a straight line and you'll have a new pillow in no time!

here's what you need:

- a sewing machine
- fabric. 1 yard will do for most of you. throw pillows at 16x16 are pretty standard.
- thread to match your fabric
- pins
- pillow insert (i like west elm's feather/ down versions, but any poly version would work well too)
and here's your how-to...
1. measure your pillow. in this example, mine is 16"x16".

2. cut your fabric with a width equal to the shorter pillow dimension (in this case it does not matter since width and length are the same). cut the length to 2x the length of your pillow + 4 inches.

in my case, the fabric i need is 16"x36".
3. with the backside of the fabric facing up, fold over one inch on each edge of the fabric's length. pin and sew. your fabric will now be 2 inches shorter in length.
4. now, with the backside of the fabric still facing out, fold your fabric into a little envelope.

the length should be 1 inch smaller than the length of your pillow - in this case 15".

the width will remain the same as those sides remain "unfinished".

pin the unfinished sides and sew 1/2-inch in from each. this will give you a finished size 1 inch smaller than your pillow in each measured dimension.
5. turn your pillow cover finished side out and insert your pillow form. your pillow should be nice and full because the cover is just a tad tight.

now sit back and enjoy your handiwork!

maybe you even have time to make some festive pillows for the holidays. throw 'em on the sofa for a refresher before the family arrives, toss a couple on the guest bed for an update, or make one for your room to FANCY it up!

13 December 2010

curtain call redux! (10 easy steps to silk curtains)

new sparkly curtains for the dining room (please, as usual, excuse the mess!)

well, my dears, i am finally making some headway in the dining room - it's beginning to look like a place where i might ACTUALLY entertain.
in an effort to lively up the place, i made another set of silk curtains this weekend. they turned out fab so i thought i'd share the instructions again. they are very easy and very inexpensive compared to ready-made panels (and even more so if you'd have to have them custom made like i would for my monster windows).
so, without further ado, here you go...

******************************************

i don't want to show you TOO much of my bedroom and ruin the surprise (i'm still waiting on my bedding and my AMAZING chandelier), but i thought some of you might find this quick tutorial helpful.

one of the best ways to create a bit of drama in a room, and to give it some added height and "dimension", is to add some great window treatments. i, personally, have a fondness for silk dupioni curtains - but i find the price for ready-made prohibitive. i mean, like, FAINT-WORTHY prohibitive.

because i am blessed with a bedroom that has 12-foot ceilings and 4 very tall windows, the ones i browsed at pottery barn (the tallest they've got) were $179 PER PANEL. multiply by 4 and throw in the rods and clips and liners and i just about had a HEART ATTACK. (plus, i'll be honest, i just don't like shopping there.)

instead, i found two FANTASTIC sources of silk online, silkuneed.com and silkbaron.com. they both carry loads of lovely colors and all for $9.99 a yard or less. i spoke with the owner of silkuneed, pam, and she shipped me some samples that were not available on her website. i was able to match my paint exactly!

so, i ordered up 14 yards at $8.99. add on the thread i needed at $3.99, and i had the equivalent of what would have cost well over $700 at pottery barn for under $130.

next was a pit stop to hancock fabrics for thread and black-out lining. at $5.99 a yard, this is a very good investment. it helps with city noise reduction, heat retention, and lets me sleep past 6:30am - when my room turns into a vampire's worst nightmare (that link is for you, melissa. i still refuse to give in!)... you know, minus the crosses, holy, water, garlic and silver stakes (unless you count the hand-dandy maglite 4-cell i keep next to my bed as a silver stake).

OKAY - time to head back to mom's house and get to stitchin'!

step one: roll out black-out liner nice and flat. smooth with your hand.

step two: line up cut fabric ends and roll silk onto liner. smooth as well. (*note: if you're using a fabric that looks different on each side, place the side you want to display away from you - i.e. when you roll it out, you should see the back of your fabric.)

step three: pin top and sides. pin further than the length of your curtain.

step four: measure both sides to desired length. my windows are 108" high, so i opted for 112". i wanted them to puddle gracefully on the floor (this also allows for more error than ones that skim the floor - you'll need to be much more precise).

step 5: using a fabric marker and a level, draw a straight line across your fabrics. cut along this line and pin next curtain top as you go.

step 6: (ask mom to) sew top and sides of curtain to liner.

step seven: trim excess fabric around your hems.

step eight: turn panel inside out and smooth.

step nine: (ask mom to) stitch bottom as desired. i like to do this by hand so you see no thread at all on the finished curtain. (but you could just as easily zip along the edge with a machine in 30 seconds.)

REPEAT steps 1-9 as necessary.

step 10: hang your lovely curtains! i bought simple satin nickel double rods by levolor at home depot for $24.99 a piece. to hang the panels, i bought 1" nickel drapery clips at target for $4.99 a pack (one per panel).

these make hanging curtains a snap. just clip them and go! and the look is much cleaner than pole pockets (*blech*).

i'm still working on the tiebacks (and the sheers that will hang behind the curtains), but you can buy or make whatever you like. you'll see them in my bedroom "afters" soon.

here's a breakdown of what i spent:

silk: 14 yards at $8.99 - $125.86
black-out fabric: 14 yards @ $5.99 - $83.86
thread: $3.99 for one roll
curtain rods: $24.99 x 4 - $99.96
drapery clips: $4.99 x 4 - $19.96

TOTAL: $333.63 (compared with well over $1000 at pottery barn or equivalent) and about 2 hours of sewing.

this is a quick project that saves you LOTS of cash and can be done by even the most "beginner" of sartors and seamstresses (though my mom is a PRO).

hope you've enjoyed this how-to! let me know if you have questions!

and a BIG KISS to mom for all of the help! xx

01 June 2010

you are the apple of my eye...

"forever you'll stay in my heart..."

isn't stevie wonder just the awesome-ist? if you say no, i just don't think we can be friends anymore. (unless you bring me booze. it's true, i am easily bribed.)

anywhoooo... huzzah for holiday weekends! right? are you with me? it was absolutely GORGEOUS here in san francisco and the weather inspired me to work on a quick art project.

i was tired of looking at the big, blank wall in the kitchen and was inspired by this photo of sarah jessica parker's hamptons kitchen (which is very similar to the plan i have for mine, you'll note!):

i love the big pop art apple, so i decided to make one of my own.

first i bought a sheet of oak plywood and had them cut it to 36"x36" (and other various sizes for future projects). i took it home and whitewashed it with CHEAP white acrylic paint.


then i free-handed (is that even a word? and who else out there is thinking "FREEBIRD!!!"?) the apple shape in red paint.


filled it in and fixed the shape a bit.


the stem was the hard part. i couldn't decide on the shape i wanted, so i played around with a pair of scissors and some paper towels (i'm high-tech, i tell ya). when i got what i wanted, i painted the edges of the back side and stamped it on to the plywood.


then filled it in, et *voilà* - a giant pop art apple of my very own!


total cost was $24 for the sheet of plywood and $7 for the craft paint. and maybe 1 hour total of painting time. not bad, eh?

when the kitchen is complete next month, i'll show you what it looks like on the wall.

hope this inspires you to pick up a paintbrush!

25 January 2010

tips from me (ha!)

get inspired!

my first piece of advice is to ignore my advice.

however, several folks have asked me recently for help with decorating and design and, in the process, have also requested some tips.

so, i grabbed a glass of scotch (ladies, trust me, whisky is a good thing!) and thought about it for a few minutes. and, *voilà*, here's what i have to say on the subject for those of you who care.
  1. keep a folder for inspiration - seriously, blog it, create a tumblr account, cut stuff out of magazines, keep an inspiration board. the #1 problem i see when people start to decorate is that they have NO IDEA what they actually like. when they start to save images that they love though, they start to understand what (visually) makes a happy home for them. without this, you're sort of dead in the water (and likely to end up with a lot of matchy-matchy pottery barn mess. *blech*)
  2. MORE is more! - this is a personal tip if you happen to like my style. i don't like clutter, but i do love being surrounded by color, texture, collections that make me happy. so don't be afraid to do anything over the top - it's easy to fix and, more likely than that, you'll love the result!
  3. be fearless - mix & mis-match! - every big box store has some awesome pieces that would work well in your home and with your style. just don't buy the whole ensemble, okay? remember that "friends" episode? phoebe may have come around in the end, but she was right at the start. do you really want your friends to walk into you house and say, "ooh - pottery barn."? didn't think so.
  4. trendy AND timeless works - a lot of folks will say that you should concentrate on quality/ timeless pieces when you decorate your home. and that's it. i only agree half-way. i think it's GREAT to invest in some quality items that you love - from furniture to artwork to jewelry to wardrobe - but not at the expense of indulging in trends if you like them. think of your home like you do your wardrobe - it evolves, you hold onto classics, you introduce cheap baubles from forever 21, and pick up hip new pieces that you'll trash next season. have fun!
  5. use color - i don't believe in feng shui, per se, but i do believe that having a full spectrum of color in your home makes it a happier place. look for ways to incorporate pops of color - even if you lean towards the more serene (see my "project doorway", for example). and if you're into color, just go for it!
  6. do it yourself! - can't afford it? then learn to do it yourself! really, you can do or make just about anything you set your mind to!
  7. keep your treasures and share them - all of those beautiful pieces that have been handed down to you over the years, artwork that you've collected, jewelry that you love. all can be displayed and make you home look like "you".
  8. impulse the small stuff - see something you love that doesn't bust your budget? buy it and bring it home! some of the things i love most in my home were impulse buys. witness my kit cat clock and the most beautiful lamp in the world

    even gwen stefani keeps track of her inspirations.

  9. wait on the big stuff - don't buy something just because you need to fill a space, it can wait. big pieces, like sideboards, dining tables and the like, make a huge style impact in your home. it's okay to make due with what you have until you find something you love-love-can't-live-without.
  10. collect when you travel - not, like, "my boyfriend went to machu picchu and all i got was this stupid t-shirt" kind of collecting. pick up hand made pieces, artwork, textiles that will remind you of where you've been. they are conversation pieces and will take you away on mental holidays when you look at them.
  11. hit the big box stores - i might not be a fan of "whole house from the summer'08" catalogue symptom, but i do think that the big chains all have big-ticket items that you can mix into your decor. i, personally, am a big fan of ikea for just this reason. their designers are doing some great things!
  12. but also resist the big box stores - get personal with your "accessories". indulge in the big pieces, but get the small stuff elsewhere - like small, local shops, salvage yards, antiques fairs. your home will have much more personality that way. it should be a reflection of you
  13. become an artiste! - frame your own work. took some amazing photos on your last holiday? blow 'em up to poster size and frame them! find a piece of art that you love that's too spendy? buy a canvas and make a copy-cat version! you can do it!
  14. outside in - flowers & plants really add color, texture and life (literally!) to a home. shop your local farmers' markets and plant supply stores, (or even your own backyard). your eyes and lungs will love you for it.
  15. BUY WHAT YOU LIKE. - this is an important one. if you love it, buy it. if you're indifferent, set it down and back away slowly. and, if you're thinking about it for days, try to make it happen. there's a 99% chance that it'll work with whatever you have because we each have a very distinct style. so go ahead and buy that glittery purple tissue holder for your bathroom! ;)
okay - so what tips would YOU add to this list?

23 November 2009

curtain call. (10 easy steps to silk curtains.)


i don't want to show you TOO much of my bedroom and ruin the surprise (i'm still waiting on my bedding and my AMAZING chandelier), but i thought some of you might find this quick tutorial helpful.

one of the best ways to create a bit of drama in a room, and to give it some added height and "dimension", is to add some great window treatments. i, personally, have a fondness for silk dupioni curtains - but i find the price for ready-made prohibitive. i mean, like, FAINT-WORTHY prohibitive.

because i am blessed with a bedroom that has 12-foot ceilings and 4 very tall windows, the ones i browsed at pottery barn (the tallest they've got) were $179 PER PANEL. multiply by 4 and throw in the rods and clips and liners and i just about had a HEART ATTACK. (plus, i'll be honest, i just don't like shopping there.)

instead, i found two FANTASTIC sources of silk online, silkuneed.com and silkbaron.com. they both carry loads of lovely colors and all for $9.99 a yard or less. i spoke with the owner of silkuneed, pam, and she shipped me some samples that were not available on her website. i was able to match my paint exactly!

so, i ordered up 14 yards at $8.99. add on the thread i needed at $3.99, and i had the equivalent of what would have cost well over $700 at pottery barn for under $130.

next was a pit stop to hancock fabrics for thread and black-out lining. at $5.99 a yard, this is a very good investment. it helps with city noise reduction, heat retention, and lets me sleep past 6:30am - when my room turns into a vampire's worst nightmare (that link is for you, melissa. i still refuse to give in!)... you know, minus the crosses, holy, water, garlic and silver stakes (unless you count the hand-dandy maglite 4-cell i keep next to my bed as a silver stake).

OKAY - time to head back to mom's house and get to stitchin'!

step one: roll out black-out liner nice and flat. smooth with your hand.

step two: line up cut fabric ends and roll silk onto liner. smooth as well. (*note: if you're using a fabric that looks different on each side, place the side you want to display away from you - i.e. when you roll it out, you should see the back of your fabric.)

step three: pin top and sides. pin further than the length of your curtain.

step four: measure both sides to desired length. my windows are 108" high, so i opted for 112". i wanted them to puddle gracefully on the floor (this also allows for more error than ones that skim the floor - you'll need to be much more precise).

step 5: using a fabric marker and a level, draw a straight line across your fabrics. cut along this line and pin next curtain top as you go.

step 6: (ask mom to) sew top and sides of curtain to liner.

step seven: trim excess fabric around your hems.

step eight: turn panel inside out and smooth.

step nine: (ask mom to) stitch bottom as desired. i like to do this by hand so you see no thread at all on the finished curtain. (but you could just as easily zip along the edge with a machine in 30 seconds.)

REPEAT steps 1-9 as necessary.

step 10: hang your lovely curtains! i bought simple satin nickel double rods by levolor at home depot for $24.99 a piece. to hang the panels, i bought 1" nickel drapery clips at target for $4.99 a pack (one per panel).

these make hanging curtains a snap. just clip them and go! and the look is much cleaner than pole pockets (*blech*).

i'm still working on the tiebacks (and the sheers that will hang behind the curtains), but you can buy or make whatever you like. you'll see them in my bedroom "afters" soon.

here's a breakdown of what i spent:

silk: 14 yards at $8.99 - $125.86
black-out fabric: 14 yards @ $5.99 - $83.86
thread: $3.99 for one roll
curtain rods: $24.99 x 4 - $99.96
drapery clips: $4.99 x 4 - $19.96

TOTAL: $333.63 (compared with well over $1000 at pottery barn or equivalent) and about 2 hours of sewing.

this is a project that saves you LOTS of cash and can be done by even the most "beginner" of sartors and seamstresses (though my mom is a PRO).

hope you've enjoyed this how-to! let me know if you have questions!

and a BIG KISS to mom for all of the help! xx

19 November 2009

that takes the cake! (a "how to".)

this past weekend marked the 3rd birthday of my favorite little girls - my nieces charlotte and emily (yes, they were named after the brontë sisters).

at age three, they are finally aware of the significance of a birthday and were looking forward to their party, presents and, especially, their cake (they are being raised by a pair of international foodies).

so, this year it was up to them to decide on the theme of their cake, and they wanted a merry-go-'round. they specifically said "no horses" and requested a cassowary (did i mention that they are also exceptionally bright?), alligator and owl, among others.

the cake, needless to say, was a huge success. the kids, and the adults, loved it. sarah and i were very proud (and not a little exhausted).

here follows a tutorial on building a merry-go-'round cake of your own (please excuse the crappy quality of the photos - all were taken with my camera phone. again.).

using two 12-inch cake pans, bake your favorite cake recipe. i prefer a good devil's food cake.

make your favorite filling (that'll be ganache for me) and frosting (salted, browned butter) as well.

frost evenly and place in your freezer until firm. (emily and charlotte anxiously looking on.)

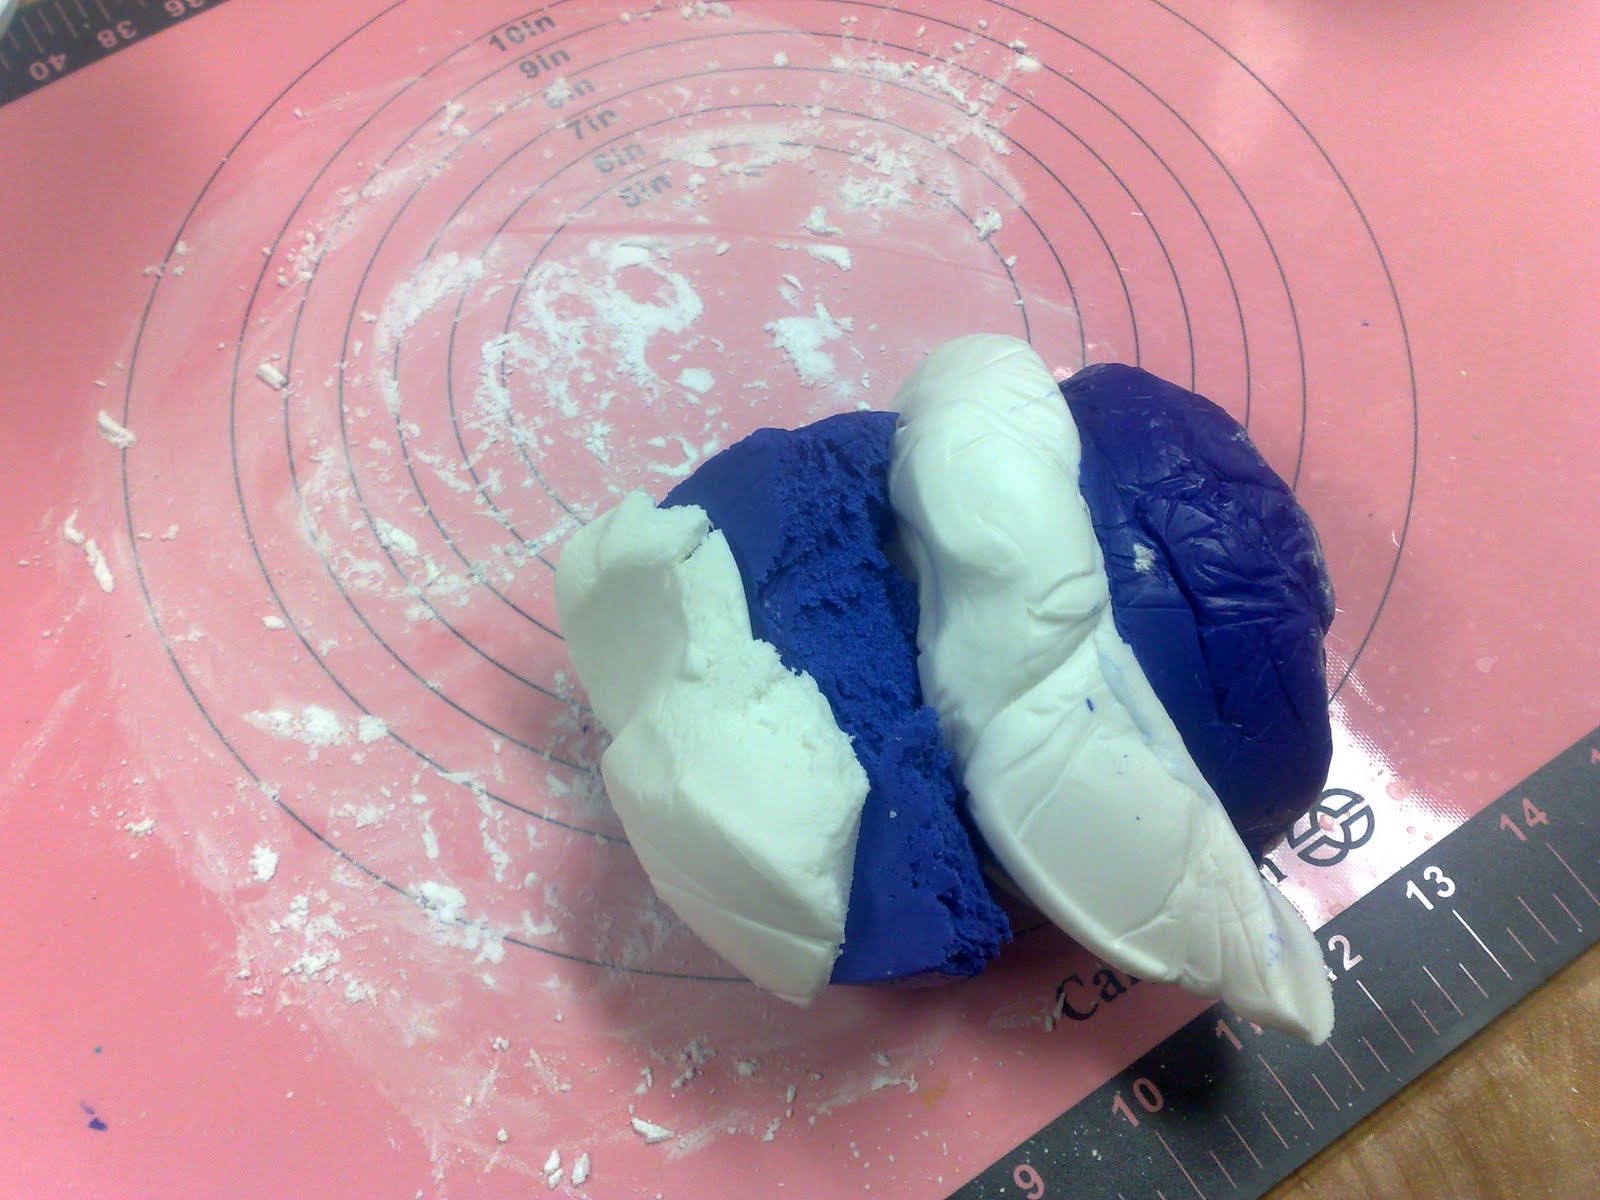
choose your color for the base. we went with cornflower blue, which required some mixing.

note that we normally mix all colors by hand using gel and powders, so it was a TREAT to work with these pre-colored fondants!

mix your colors.

knead, knead, knead.

roll, roll, roll. roll it out to about 15-inch circle.

lay gently over cake and smooth.

trim the excess and reserve for top.

cover 6-inch cylinder with fondant. (you can make or buy one.) we used white.

for extra sparkle, we painted it with gold dust (mixed with rum to adhere).

cover seam with decorative band. we used rainbow metallic dragées. (placed one-by-one with tweezers. UGH.)

cover a 12-inch cake base in fondant. (here, again, we used cornflower blue). center on cylinder.

oh boy! that's a BIG cleaver!

select eight 1/4-inch dowels. dust with gold powder for shimmer.

cut to desired height. should be just an inch taller than the top of the "top". (we learned this the hard way so you don't have to!)

place dowels in two sets of four. one square should run close to the edge of your top. the other should be set back an inch and be rotated 180-degrees. add a taller one dead-center.

take a break and eat a banana. and some cheese. hey - i like them both.

add a decorative edge to the "top". we used a scalloped press and glued pieces on with water. we also added gold dragées at each seam for decorative effect.

place decorative edge on cake's bottom seam. here we used "happy birthday" ribbon.

time for the fun part. sarah made the fondant animals (yes, they're completely edible) in advance to save us some time. and there's your cassowary on the bottom left!

using super glue, add animals to your dowels.

roll out two colors of fondant, we chose red and white, and cut 4 long triangles of each for the tent top. (you'll need to do some calculations of your own here based on how tall you want it. let dry overnight.)

also, make snall flag for tippy-top and roll over dowels to dry. we added a "3" to mark the occasion.

before serving, add all triangles and flag. reinforce with super glue if needed.

stand back and admire your work!

deliver to adoring public.

let them play. (note, we placed the cake on a lazy-susan for extra fun.)

then let them eat cake! i think you can tell from the looks on their faces that there were no complaints!


and here, in case you're curious, are some of the other cakes we've collaborated on over the last couple of years: http://www.facebook.com/album.php?aid=16718&id=721881537&l=7e4ea01e83
Related Posts with Thumbnails

Followers